Destiny 2 Salvation’s Edge 2026 Raid Guide Encounters 4-5

The June 9th update brings tiered loot to every raid and dungeon in Destiny 2. Each one will see their weapons get a loot refresh and an individual armor set. The armor sets come with their own set piece bonuses. This article is the second part of our Salvation’s Edge guide. For the first three encounters, look at part one. Part two looks at the Verity and Witness encounters in Salvation’s Edge.
Salvation’s Edge: Verity
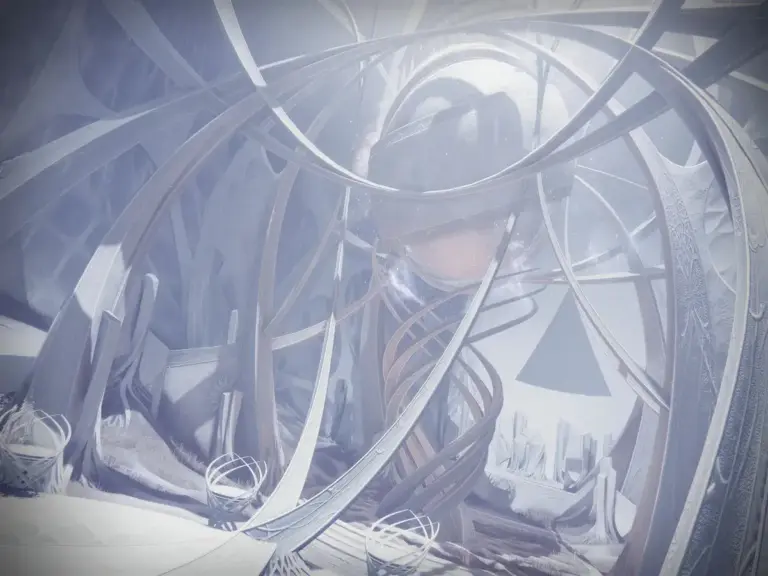
After clearing the third encounter, you will find yourself in a bright room. Prepare for the most complicated encounter in Salvation’s Edge. In Verity, you will have two jobs. However, unlike Verity, you do not choose. The game will teleport three players into their individual rooms. Before we start the encounter, ensure that all players have distinct fashion and ghosts. Match the players to their ghosts and fashion, to know who is who. Interacting with the statue at the back of the room starts the encounter. When the encounter starts, there will be a 3:30 Imminent End wipe timer.
Individual Room Players
When you teleport into the room, you will see three statues as well as shapes shifting on the back wall. The statues will be holding one of the three shapes:
- Circle
- Triangle
- Square
Call the order of the shapes from left to right. One of the statues will be you. At the back of the room, shapes will spin around. At least one of the shapes will match the shape that your statue is holding. There is a chance that both shapes match. If they do, you can skip phase one.
Phase One
Two Knights spawn in your room. Killing them drops one of the shapes that is on the back of your wall. Find the shape that your statue is not holding. Pick it up and run to the statue of the player holding that shape. Interact with the statue to send the shape to them. If done correctly, every player will have two of the shapes they are holding, and you can begin phase two.
Phase Two
Kill the Ogre that spawns in your room to respawn the Knights. Kill the Knights and pick up one shape at a time. Deposit each shape into the other two players’ statues. After you deposit all the shapes, the players should only have shapes that do not match your statue. They should also not be the same shape. Now begin Phase Three.
Phase Three
Kill the Ogre to spawn more Knights. Kill the Knights and now pick up both shapes. Picking up both will give you the 3-D shape version of the two shapes. Run to the front of the room and wait for the glass to crack. Once it cracks, run through. For the glass to crack, the outside team must complete their task.
Outside Team
While the inside team is swapping their shapes, three players on the outside need to dissect shapes. As with the individual rooms, the outside players see the statues and three Hive Knights. The difference is that they have access to the full room, and the statues hold 3-D shapes. Listen for the callout of the order from the inside room players. Your job on the outside is to make the 3-D shape not contain the shape they hold in the inside rooms.
To move shapes around, you must pick up one of the shapes from the Knights. Deposit one of the shapes in one of the statues. You can only deposit a shape in a statue if it is already holding it. Depositing a shape in another statue swaps the shapes. The 3-D shape that those two statues hold changes. Once all three shapes match, the inside players can leave their rooms.
The Ghost Phase
After around six deposits, the Witness will notice your efforts. He will “kill” all three inside players. Their ghosts will spawn in the outside room. The outside players should pick up one Ghost. Run to the front of the room near the rally flag. The now “dead” players can spectate their teammates. They will see one player’s statue. Call the player, that is, and where they are. The inside player will deposit the Ghost at the statue to revive it in the individual room. After you revive all three players, return to your tasks.
The Second Ghost Phase
After all three players leave, have everyone meet at the front of the room. The timer will stop, and enemies will spawn. Kill the two Unstoppable Ogres to begin the next Ghost Phase. The Witness will “kill” five of the six players. The “dead” players can only see one statue again. Call the statues, and the live player deposit. Every deposit revives a teammate. Continue until all six players are alive. Keep in mind, you will have a one-minute Imminent Wipe timer. After completing the phase, a second rotation of the encounter starts. Complete three rotations to finish the encounter.
An Example
To better understand the encounter, we want to give a practical example.
- The three players teleport into their rooms, and their statues read: Triangle, Square, and Circle.
- On the back of their walls are
- Left Player – Triangle+Square
- Middle Player – Square+Circle
- Right Player – Circle+Triangle
- The outside statues are
- Left Player – Cone (Triangle+Circle)
- Middle Player – Triangular Prism (Triangle+Square)
- Right Player – Cylinder (Circle+Square)
- Phase One
- The left player deposits a square in the middle statue
- The middle player deposits a circle in the right statue
- The right player deposits a triangle in the left statue
- Phase Two
- The left player deposits a triangle in the middle, and the right statues
- The middle player deposits a square in the left and the right statues
- The right player deposits a circle in the left and right statues
- Phase Three
- The left player picks up a cylinder
- The middle player picks up a cone
- The right player picks up a triangular prism.
- Outside team
- Take a triangle from the left statue and swap it with a square from the middle statue.
- Next, take a circle from the right statue and swap it with a triangle from the middle statue
- First Ghost Phase
- Deposit the ghosts based on where the players call
If you do the shapes inside and outside correctly, the inside players can leave with their 3D shape. After completing the third rotation, the encounter ends.
Salvation’s Edge: Fourth Traversal Section
Take the elevator up to a series of roots. Ascend the roots, while killing the enemies on your path. Once you reach the top, everyone must be by the door. Stand on the platform, and it will rise to the final encounter.
Salvation’s Edge: The Witness
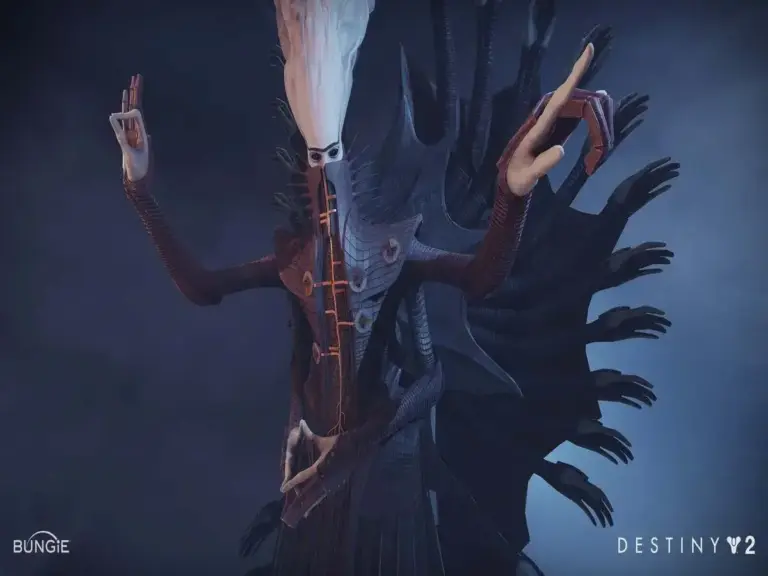
You will need three players for The Witness mechanics. You technically only need one, but it is easier with three. Three types of hands spawn in this encounter. Two of the hands are airborne, while the third protrudes from the floor. The floor one is the circle hand. Standing in the circle hand’s attack grants the player spherical resonance. The Square hand will shoot in a line. Standing in the line gives the player Hexahedron resonance.
The final attack is from the triangle hand. The triangle attack will choose a player to follow. Standing in the attack gives the player Pyramidal resonance. If you stand in the attack at the end of its cycle, it will deal damage to the player based on the hand.
- Circle – Bees
- Square – Beam attack
- Triangle – AoE damage
Assign one player to every hand. Each hand will also have a band around its wrist. Shooting the band while standing in the attack, without a buff, will cause the band to change color. The three colors relate to the resonance needed:
- Red – Hexahedron
- Green – Pyramidal
- Yellow – Spherical
The bands will never have the color of the hand that you are shooting. For example, the circle hand will never be yellow. You must get the resonance matching the band. Return to the hand and shoot it again while standing in the attack. If you have the correct resonance, you will get a Glyphbreaker buff. You can break one of the buttons on the Witness’s chest. You six Glyphbreakers to start the damage phase. Two vital points to consider: after breaking a hand, it will disappear for a brief period. As a result, wait until your teammate has their resonance to break it. You must also be quick.
After around 4/5 attacks from the same hand, it will disappear. It had a 50% chance to change its band color. After breaking a Glyph, Subjugators spawn: a Strand Subjugator on the left side and a stasis one on the right side. If one of the Subjugators is alive when you break a Glyph, the other one will not respawn.
The Witness’s Test
After successfully breaking a band, the Witness has a chance to test you. The test will never happen after breaking the first arm. The arm that you break will make a sound and glow yellow. Remember this arm. The Witness will spawn Cruxes in front of you. There are fourteen cruxes in total. You will need to shoot the cruxes to form the shape of the hand that screamed. There are always six cruxes that you must shoot.
- Square Hand
- Shoot the six inner cruxes
- Triangle Hand
- Shoot the top left and top right corner cruxes
- Circle Hand
- The four corner cruxes and the two central cruxes
If done correctly, you can move freely. After a short duration, the Witness will attack the platform. Make sure that you jump to dodge the attack. If you do not, you will die. If you fail the test, the Witness traps you, and you wipe.
The Cleansing Mechanic
If you pick up too much resonance, or a non-hand player has resonance, they must stand on the middle platform in front of the Witness. When a player breaks a Glyph, it will cleanse the resonance from anyone standing on the platform.
The Damage Phase
After breaking all six glyphs, the damage phase starts. Have everyone gather on the middle platform. The platform will rise. At its apex, the Witness’s chest opens. Deal damage to the vulnerable section. Periodically during the damage phase, the Witness will over a portion of the plate in a beam attack. Avoid this attack by moving around. He will always follow the attack with another attack that covers the other portion of the platform.
He will also do the attack from the test mechanic. Make sure that you jump when the attack hits to dodge it. After multiple rotations of attacks, the Witness will slam the platform. Leave before he slams, and the process starts again. Once you reach the Final Stand threshold, the Witness becomes immune for a brief duration. Deal damage to him while he is vulnerable, and he attacks again. You only have a short window to kill him. If you fail, you will wipe. Kill him, and you complete the Salvation’s Edge raid in Destiny 2.
Related Destiny 2 Content
Salvation’s Edge is one of many raids in Destiny 2. You can expect more raid and dungeon guides and Destiny news to follow in the coming days. Below are previous articles we have on Destiny 2.