
Overwatch Season 4 Hero Guide: Creating Pandimonium as Hazard


The Overwatch roster is starting to settle. It is time to revisit the rest of the hero roster. Hazard is true to his name. Find the correct angles, and he becomes a hazard to his opponents. Finding and using those angles is easier said than done. Fear not, we have you covered! We will teach you everything you need to know to become hazardous.
Hazard’s Kit Breakdown and Tips
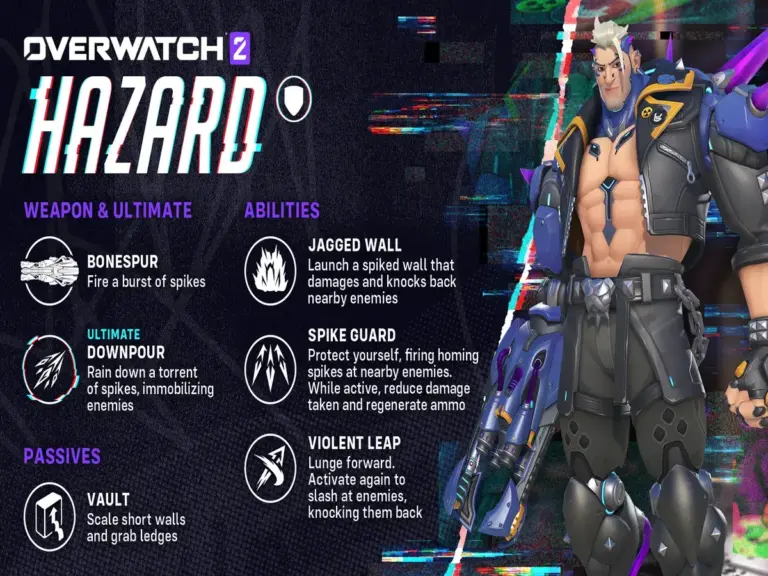
Vault – Scale short walls and grab ledges.
Hazard has a weaker wall climb than Genji, Hanzo, and Kiriko. You will need to be near the top of a ledge to climb up to high ground. It increases his overall verticality.
Bonespur – Fire a burst of spikes.
Bonespur has a fairly short range. You can deal chip damage at long range. Do not use all your ammo before engaging. His primary fire is slightly better at range than Doomfist. For ideal damage, aim at a character’s upper body. It ensures most pellets land.
Spike Guard – Protect yourself from frontal damage. Fire homing spikes at nearby enemies and regenerate ammo.
Spike Guard is your best defensive tool. Use it to block any lethal damage. You do not need to deal damage with the spikes. If you can get close to block damage and land spikes, you are golden. At long ranges, only block if you are under pressure. Otherwise, maintain your block energy for engages.
Violent Leap – Lunge forward. Activate again to slash enemies, knocking them back.
Violent Leap is the only way for Hazard to close the gap. Ideally, you want to deal damage with Violent Leap. The target is too far away, or they use a movement cooldown. Landing the leap damage gives you a chance to burst a target. You might use two Violent Leaps before you reach your target. If you land the damage, follow up with a primary fire and melee for burst. Add in a Jagged Wall for max damage.
Jagged Wall – Launch a spiked wall that damages and knocks back nearby enemies.
Jagged Wall is a flexible ability. There are four main use cases:
- Cutting off a sightline
- Cutting off an escape route
- Dealing damage
- Providing yourself cover
How you use the Wall depends on the fight. The best case is to use the Wall to increase your burst damage on a target. However, you will not always have that opportunity. Learning how to use Wall based on the situation is vital.
Downpour – Rain down a torrent of spikes, immobilizing enemies.
Downpour travels through terrain. Use that to your advantage. Ulting behind a wall reduces the reaction time. Landing five player ultimates is great; one is often enough. Taking out one target already gives your team an advantage. Do not greed your ultimate.
Hazard Season 4 Perks
Minor Perks
- Reconstitution
- Jagged Wall hits overfilled Spike Guard with 25% additional energy
- Anarchic Zeal
- Spike Guard’s spikes gain 30% lifesteal
Major Perks
- Deep Leap
- Violent Leap’s range is increased by 20%
- Explosive Impalements
- Bonespur hits marked targets with spikes. Quick Melee and Violent Leap’s slash detonate them for 30 explosive damage.
Turning Hazard Nuclear

Closing the Distance
Hazard lacks the engagement range of other dive tanks. That means he has to close the distance first, before committing to a fight. Utilize cover and your Violent Leap to prepare for fights. Minimize the damage you take. Ideally, be at full HP for when you engage. However, it rarely happens. Become creative with your pathing, but be fast. Always try different paths. Find the ones that work for you.
Engage Near Cover
After engaging, Hazard is vulnerable for a short period. If you fail to execute your dive, opponents can turn on you. If you can engage on a target near cover, you will have an escape route. Use the downtime between your Violent Leap cooldowns to hide. If you can push your advantage, take the opportunity. Always assess the state of the fight. Only commit where you have a high chance of winning.
More Overwatch Content
Stay tuned for more Overwatch content at Total Apex Entertainment. Below are some of the other articles.
