Destiny 2 Pantheon 2.0: Calus Resplendent Guide
Pantheon returns in Destiny 2 with the Monument of Triumph update. There are three versions of Pantheon that you can run: Calus Resplendid, Morgeth Surpassing, and Insurrection Prime Revolutionary. The first two contain three different Destiny 2 bosses. The final one has all the bosses from the first two variants and adds in Insurrection Prime. In this article, we will take a look at Calus Resplendid, which has three boss encounters from raids not currently in Destiny 2.
Destiny 2: Argos, Planetary Core
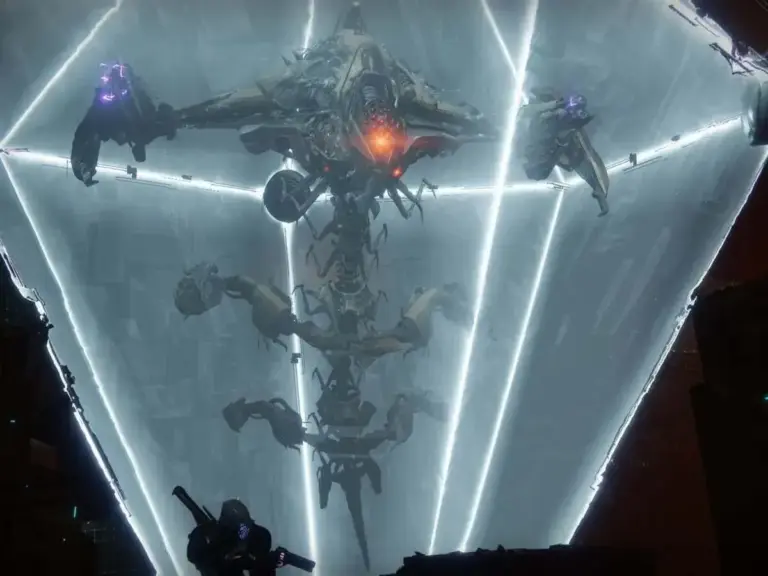
At the start of the Argos encounter, you will see three plates on different platforms in the arena. Assign two players per plate. Each plate has three stations, and each is a different affinity. The plate closest to spawn is Arc, the left side is Void, and the right side is Solar. When everyone is ready, break the crystals on Argos to start the encounter and trigger the cutscene. Have at least one player from each plate look at Argos. You should see orbs of one of the three affinities. One plate will see three orbs. Call out which ones you see. There can be various combinations of them, such as:
- One Solar, one Void, one Arc
- Two Solar, one Void
- Two Arc, one Solar
- etc.
The affinity of the orbs determines how many Vex Craniums per affinity you must charge. Malignant Hobgoblins spawn on platforms next to the plates. Killing one drops a Vex Cranium. You can deposit the Cranium at one of the three stations on each plate. You want to charge the Craniums based on the affinity of the orbs. For example, if you read two Solar and one Void, have one of the Arc players bring a Cranium to the Solar plate to charge it. The Craniums take a brief window to charge. If you charged a Cranium in the wrong plate, wait for it to finish, and then use all of it to spawn another one.
After charging all three Craniums, head to the plate that can see all three orbs. Assign one player per orb, based on the affinity required. Shoot the orbs, and follow them towards the center. You must coordinate this so everyone reaches the center at roughly the same time. After breaking Argos’ shield, look for two weak spots on it. There are six in total
- Two on its head
- Two on its arms
- Two on its back
After successfully breaking two of them, damage starts. Be wary of the detain bubbles that Argos fires. If it catches a player, they can not break the bubble themselves and will slowly float away. Only other players can break players out of the bubbles. If Argos does not die in one phase, repeat the process. You will need to break a different set of weak spots for the next phase. After Argos dies, collect your loot and progress to the next encounter through the flag.
Destiny 2: Galhran, the Sorrow Bearer
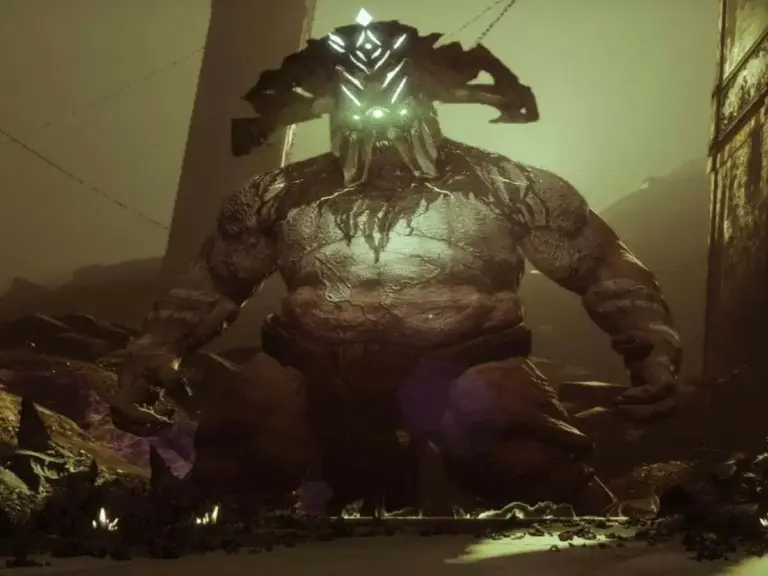
The Gahlran fight will see players split up into three teams of two again. Have one player per group stand in the middle near the rally flag. After the encounter starts, a pool spawns that will give the players the Witch’s Blessing buff. The buff allows you to kill certain Hive enemies. Split up into your teams, one team per Gahlran. Clear the waves of enemies. When your buff timer drops to around ten seconds, have you and your partner run to an orb in the arena. Once both players are inside, shoot the orb to transfer the buff. You do not want the buff to run out, as that person will die.
Eventually, Galhran’s Deceptions will start spawning. You will need the Witch’s Blessing player and the non-buffed player to melee the Deception at the same time to stun him and remove his shield. Ideally, stun him right in front of Gahlran. At this time, Galhran’s hand glows green. Shoot it, and he becomes angry. He will slam down, killing the Deception, if he does not have a shield and is in the right place. After stunning the Deception, the Witch’s Blessing player loses their buff. Have one of the players in your group stand in the orb’s circle. Another player can shoot the orb with you while standing outside of it to give you the buff again.
Gahlran will get angry and start moving his hands towards his head for a wipe mechanic. Shoot his hands to lower them, and eventually his head becomes vulnerable. Damage his head until one of two things happens. He will either disappear or stay in his spot. The one that stays is Galhran, whom you must deal damage to. Before damage starts, have players trade their Witch’s Blessing to prevent them from dying during damage.
Galhran will raise his hands again, break them to start damage. Midway through the damage phase, he raises his hands again, repeating to make himself vulnerable. The next time he raises his hands, the damage phase ends. Repeat until Gahlran dies. Grab your loot and head to the final encounter.
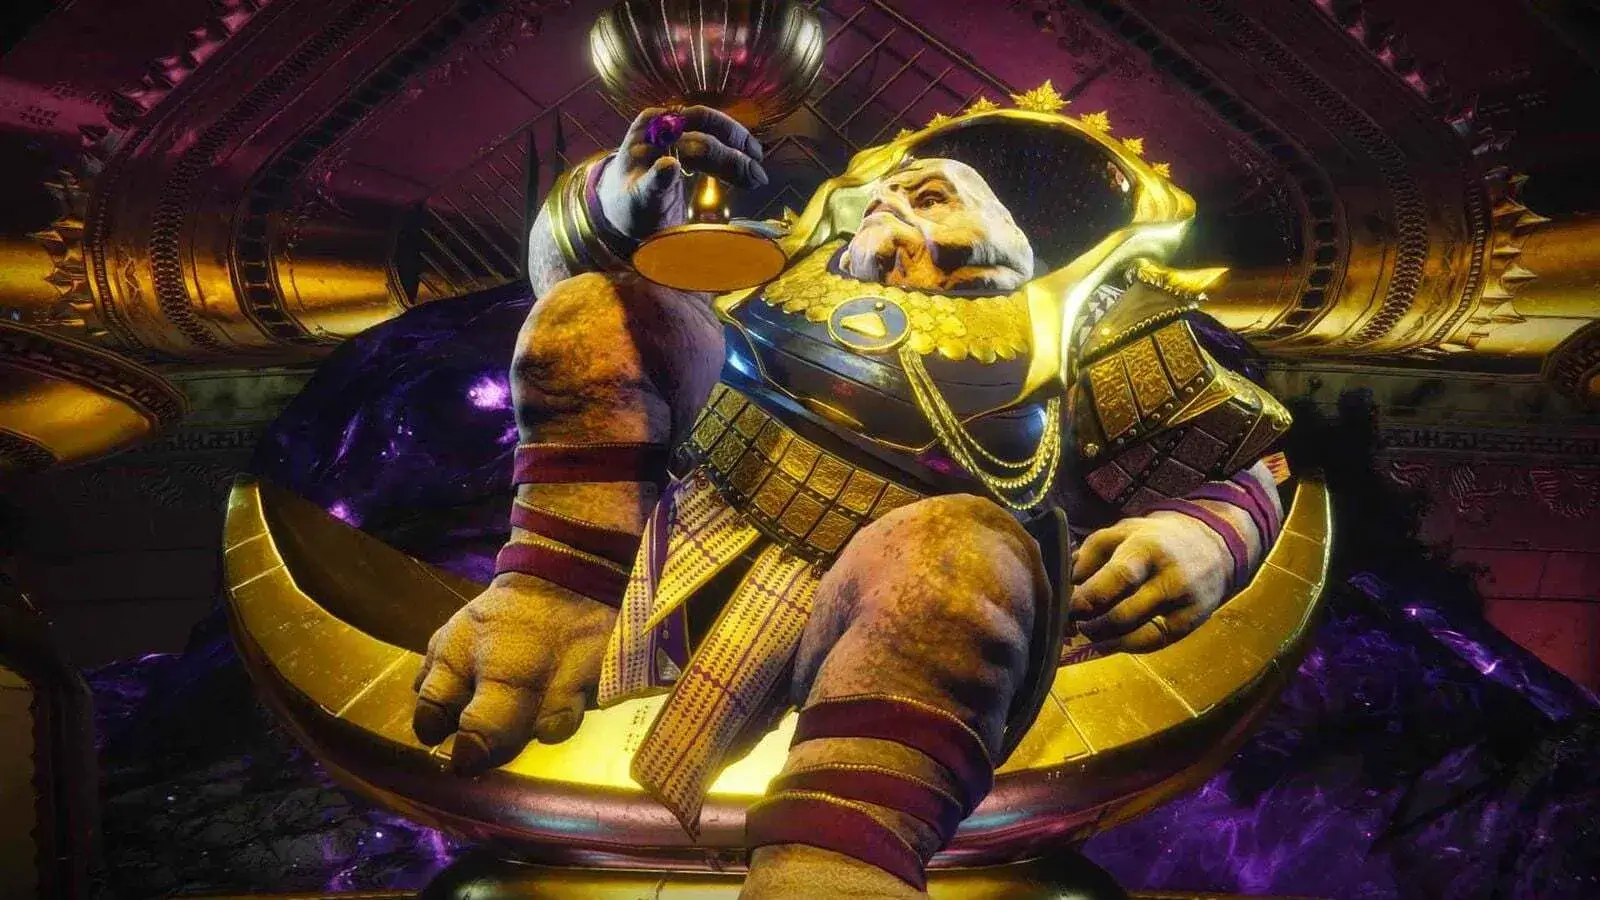
Destiny 2: Emperor Calus
Emperor Calus is the final encounter for Calus, Resplendid. For this encounter, you will need to split your team into two groups of three. The reason for this will become clear in a moment. Start the encounter by shooting Calus’ Chalice. Clear the Cabal enemies until you hear the iconic Calus double clap. He will spawn Psions on the plates and teleport everyone into the Mindscape. Here is where you will need the two groups.
- Group One – Grabs the floating orb to teleport back to Calus
- Group Two – Stays in the Mindscape
The Mindscape
Group two stays in the Mindscape and must pay attention to Calus’ floating head. Periodically, symbols appear above his head:
- Axe
- Chalice
- War Beasts
- Sun
Each player must call the symbol they see. Assign an order to who calls when. For us, the left player calls first, then the middle player, then the right player. It is not essential, but it makes it easier to hear every symbol. You must also kill the Shadow Psions in the arena. After group 1 completes their task, the barrier in front of you disappears, and you move forward. Be wary of any ramps; these will send you over the barrier and to your death.
The next set of symbols appears. Repeat until you have called four symbols. Calus will now start sending skulls in your direction. Shoot as many as possible to prevent your death. Every skull you destroy grants you a Force of Will buff. The buff increases the damage you deal to Calus. After group 1 breaks Calus’ shield, orbs appear in front of you. Grab one to return to the arena.
Inside the Arena
When group one teleports back into the arena, they will see four Psions floating in bubbles. Each one will have a symbol above them. When the Mindscape players call their symbols, identify the one missing. Kill the Psion under the symbol that is missing. While the Mindscape players are destroying skulls, a barrier spawns around Calus. Deal damage to the barrier until its health is almost gone. During this time, you will take damage over time. Ensure that you have ways to heal yourself. Wait until the Mindscape players get around 100 stacks of Force of Will. Now you can break the shield.
The Damage Phase
You can only deal damage to Calus on the plates. The damage time per plate is not infinite. Eventually, Calus becomes invulnerable, and you must move to the next plate. The plate order does not matter. Calus will also periodically nuke the plates; you must jump when he does this. At around 66% health, Calus will break, and his crit spot becomes his exposed chest. Once his health reaches zero, Calus gains a shield. Break the shield as quickly as possible to kill Calus. Repeat until Calus, or the robotic version of Calus, dies. Drop down the hatch to reveal the Calus army and your loot.
Related Destiny 2 Content
With the Monument of Triumph update launch, be prepared for more articles on Destiny 2. Below are previous articles we have on Destiny 2.